之前的文章<<VMware vSphere东西向网络防护>>介绍了在VMware vSphere平台上如何通过操作虚拟交换机及虚拟接口来实现二层网络的微隔离。本文通过代码实例来说明调用API实现其中涉及的相关操作。
我们使用VMware官方的Python SDK来实现,SDK地址如下:
首先使用pip安装pyvmomi, 这里我们使用支持vSphere6.5的版本:
1
| pip install pyvmomi==6.5.0.2017.5-1
|
下面介绍使用Python SDK的基本流程。
使用该SDK,需要在Python中import该库:
第一步,你需要连接到ESXi主机或者vCenter, 通常情况下,vSphere环境下使用443端口,如:
1
2
| from pyVim import connect
my_cluster = connect.Connect(“10.0.0.99”, 443, “username”, “password”)
|
处理完逻辑后需要关闭连接:
1
| connect.Disconnect(my_cluster)
|
连接建立后,可以查询虚拟机、获取虚拟机信息,发送命令等等。为了获取一个虚拟机对象,可以使用searchIndex类,该类可以通过UUID, DNS名,IP地址或者datastore的路径来查找虚拟机, 比如,下面示例会输出IP为10.0.0.240的虚拟机的名称及UUID:
1
2
3
4
5
6
7
8
9
10
11
| from pyVim import connect
my_cluster = connect.Connect(“10.0.0.99", 443, “username", “password")
searcher = my_cluster.content.searchIndex
vm = searcher.FindByIp(ip="10.0.0.240", vmSearch=True)
print vm.config.name
print vm.config.uuid
connect.Disconnect(my_cluster)
|
执行后结果如下:
1
2
3
| (pyvmomi)[root@centos1 fg]
VC6.5
564d71d4-709c-f475-d255-0b695d071bd3
|
下面直接以代码示例来说明对于虚拟交换机及虚拟接口的操作。
创建虚拟交换机:
1
2
3
4
5
6
7
8
9
10
11
12
13
14
15
16
17
18
| from pyVim import connect
from pyVmomi import vim
my_cluster = connect.Connect("10.0.0.99", 443, "username", "password")
searcher = my_cluster.content.searchIndex
host = searcher.FindByIp(ip="10.0.0.41", vmSearch=False)
if not host:
print "Host Not Found"
exit(-1)
vswitch_spec = vim.host.VirtualSwitch.Specification()
vswitch_spec.numPorts = 1024
vswitch_spec.mtu = 1450
host.configManager.networkSystem.AddVirtualSwitch("vswitch_internal", vswitch_spec)
connect.Disconnect(my_cluster)
|
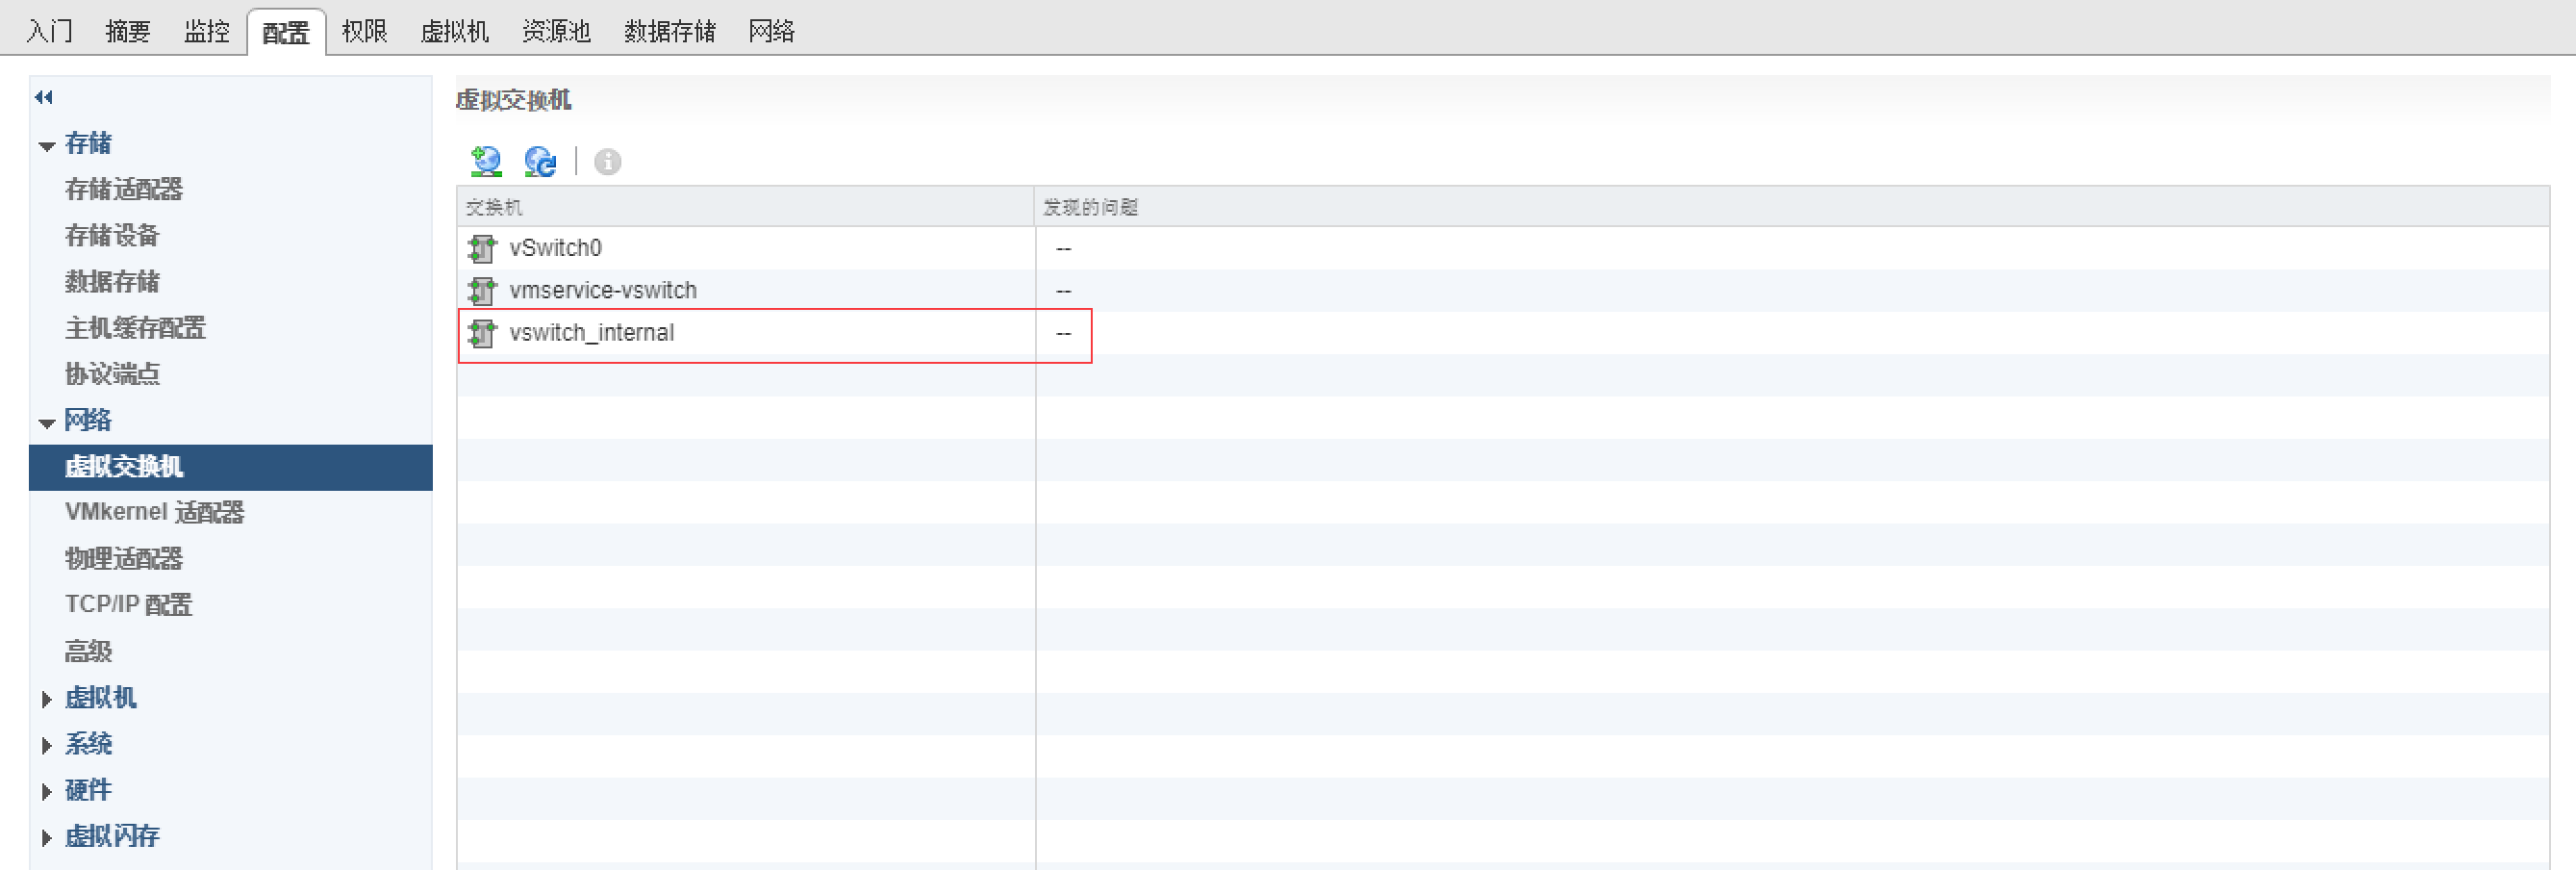
示例中,首先建立到vCenter的连接,接着查询到IP为10.0.0.41的宿主机, 在宿主机上创建一个名为vswitch_internal的标准虚拟交换机,最后关闭连接, 结果如图:
添加端口组:
1
2
3
4
5
6
7
8
9
10
11
12
13
14
15
16
17
18
19
20
21
22
23
24
25
26
| from pyVim import connect
from pyVmomi import vim
my_cluster = connect.Connect("10.0.0.99", 443, "username", "password")
searcher = my_cluster.content.searchIndex
host = searcher.FindByIp(ip="10.0.0.41", vmSearch=False)
if not host:
print "Host Not Found"
exit(-1)
portgroup_spec = vim.host.PortGroup.Specification()
portgroup_spec.vswitchName = "vswitch_internal"
portgroup_spec.name = "vlan1000"
portgroup_spec.vlanId = 1000
network_policy = vim.host.NetworkPolicy()
network_policy.security = vim.host.NetworkPolicy.SecurityPolicy()
network_policy.security.allowPromiscuous = True
network_policy.security.macChanges = True
network_policy.security.forgedTransmits = True
portgroup_spec.policy = network_policy
host.configManager.networkSystem.AddPortGroup(portgroup_spec)
connect.Disconnect(my_cluster)
|
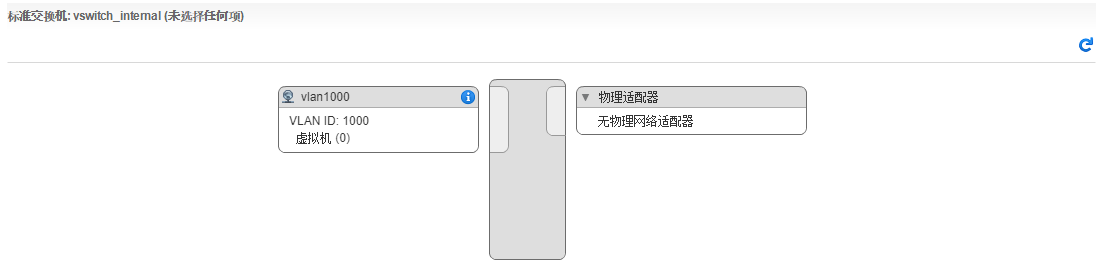
在以上示例中,首先建立到vCenter的连接,接着查询到IP为10.0.0.41的宿主机,在该宿主机上名为vswitch_internal的虚拟交换机上添加了一个VLAN TAG为1000,名称为vlan1000的端口组,并将三个安全选项都设置为接受,最后关闭连接,结果如图:
修改虚拟机网卡所连接的端口组:
1
2
3
4
5
6
7
8
9
10
11
12
13
14
15
16
17
18
19
20
21
22
23
24
25
26
27
28
29
30
31
32
33
34
35
36
37
38
39
40
41
42
43
44
45
46
47
48
49
50
51
52
53
54
55
| from pyVim import connect
from pyVmomi import vim
my_cluster = connect.Connect("10.0.0.99", 443, "username", “password")
searcher = my_cluster.content.searchIndex
host = searcher.FindByIp(ip="10.0.0.41", vmSearch=False)
if not host:
print("Host Not Found")
exit(-1)
vm = searcher.FindByIp(ip="10.0.0.240", vmSearch=True)
if not vm:
print("VM Not Found")
exit(-1)
network = None
for n in host.network:
if n.name == "vlan1000":
network = n
break
if not network:
print("Network Not Found")
exit(-1)
device_change = []
for device in vm.config.hardware.device:
if isinstance(device, vim.vm.device.VirtualEthernetCard):
nicspec = vim.vm.device.VirtualDeviceSpec()
nicspec.operation = \
vim.vm.device.VirtualDeviceSpec.Operation.edit
nicspec.device = device
nicspec.device.wakeOnLanEnabled = True
nicspec.device.backing = \
vim.vm.device.VirtualEthernetCard.NetworkBackingInfo()
nicspec.device.backing.network = network
nicspec.device.backing.deviceName = "vlan1000"
nicspec.device.connectable = \
vim.vm.device.VirtualDevice.ConnectInfo()
nicspec.device.connectable.startConnected = True
nicspec.device.connectable.allowGuestControl = True
device_change.append(nicspec)
break
config_spec = vim.vm.ConfigSpec(deviceChange=device_change)
try:
vm.ReconfigVM_Task(config_spec)
except Exception, e:
print(str(e))
exit(-1)
connect.Disconnect(my_cluster)
|
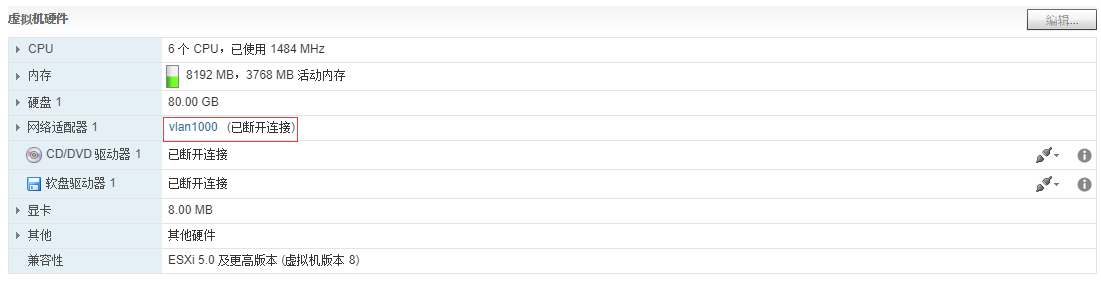
本示例将IP为10.0.0.240的虚拟机的虚拟网卡修改到上面创建的vlan1000端口组,结果如图:
上述示例尽量做了简化,若需要在生产环境使用时,可以参考官方示例库及相应文档: